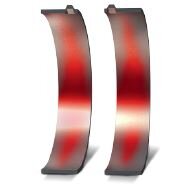
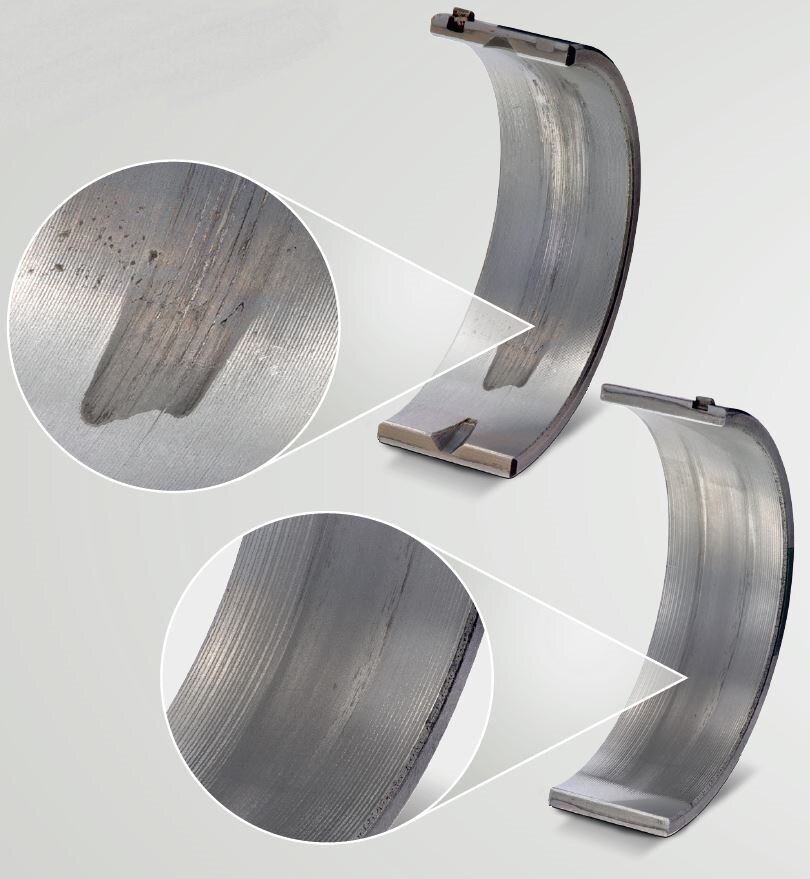
Wide wear marks in the centre of the bearing in the circumferential direction
DESCRIPTION OF THE DAMAGE

- Acute wear marks in the centre of the bearing in the circumferential direction
- Less worn bearing edges
- Local material displacement in circumferential direction
- In severe cases: signs of material fatigue and initial rubbing marks visible

Lower main bearing shell steel-aluminium composite
Clear wear marks in the centre of the bearing which taper off towards the relief can be identified. They are already noticeable as initial rubbing marks in the sliding layer.
Here, a strong wear pattern in the centre of the bearing which tapers off towards the relief can be identified. In terms of form, the wear pattern still corresponds to adaptive run-in wear.
DAMAGE ASSESSMENT
The lubrication gap in the centre of the bearing is too low, meaning that the lubricating film is not fully stable and mixed friction occurs locally. If the shortage of lubrication continues, the temperature increases due to the frictional heat that results. The shortage of lubrication continues to intensify due to the increasing temperature level. This process reinforces itself until the first initial rubbing marks and fatigue damage occur in this area due to increased surface pressure.
POSSIBLE CAUSES FOR THE DAMAGE
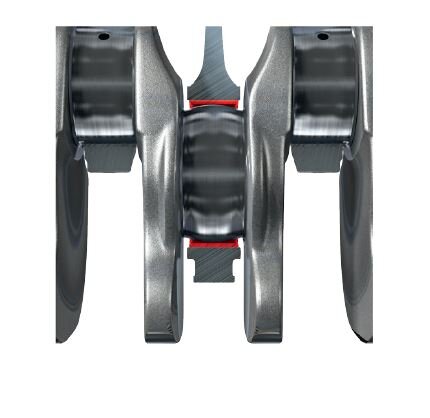
- Journal shape that is too strongly convex (Fig. 1)
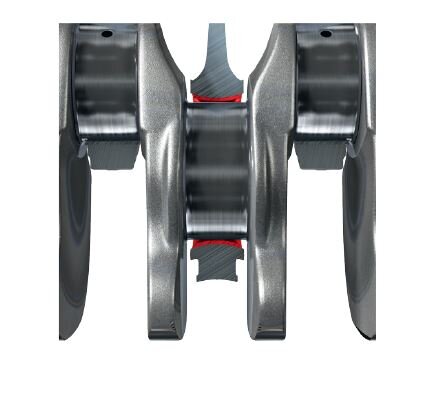
- Convex bearing bore (Fig. 2)
- Shortage of lubricant


Remedy
The bearings can continue to be used depending on their wearcondition. They should be replaced as soon as initial rubbing marks develop or indicators of material fatigue become visible and measures to determine the cause should be taken:
- Check for correct geometry of the crankshaft: dimensions, roundness, cylindricity, ripple, surface roughness
- Check the bearing line bore is correct: dimensions, roundness, cylindricity, surface
- Balance crankshaft during installation and check strain on the shaft
- Check alignment of the main bearing bore: during assembly of an engine, always make sure to use the specified tightening torques and bolt tightening sequence – the engine must be sufficiently cooled during operation as deformations may also occur due to temperatures that are too high
- Check connecting rods for angularity before installation
- Check lubrication system