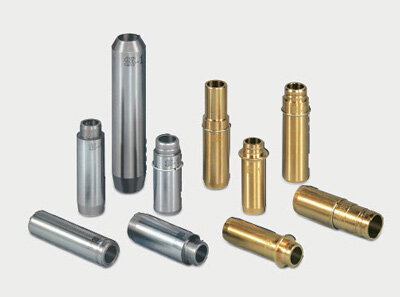
Valve guides
Practical tips – replacement and repair
Back to search
Information on diagnostics
What do I need to watch out for when replacing and repairing valves?
When replacing valves, it is very important to check the valve guides too. Consequential damage to valves can often be caused by old and worn valve guides. Also learn about standard values for valve guide clearance.
Situation
Worn, bent or burnt through valves are replaced. However, frequently the valve guides are not checked for their reusability, although the damage to the valves was often caused by worn valve guides.
The following valve damage and sealing problems can be caused by a worn valve guide:
The following valve damage and sealing problems can be caused by a worn valve guide:
- Burnt through valve head
- Breaks in the fillet of the valves
- Breaks in the grooves for the valve cotters
- Excessive wear of the valve stem faces
- Worn rocker arms on one side
- Increased oil consumption due to worn valve stem seals
- Worn or burnt through valve seat inserts
The following lists standard valve guide clearances. This information can be used alternatively as standard values if the vehicle manufacturer does not provide any values or replacing the valve train components is not allowed for. In case of air-cooled cylinder heads and high-performance engines, due to the higher thermal load the upper range of the clearance tolerance is to be aimed for.
| Stem diameter | Clearance: Intake valves | Clearance: Exhaust valves |
|---|---|---|
| 5 to 7 mm | 10 - 40 μm | 25 - 55 μm |
| 7 to 9 mm | 20 - 50 μm | 35 - 65 μm |
| 9 to 12 mm | 40 - 70 μm | 55 - 85 μm |
If a valve replacement is required, the clearance between valve stem and inner guide diameter must not exceed the specified values. If the clearance is too large or the valve guides are worn out-oftrue, conical or flared, they must be replaced.
For valves with a skirt diameter of less than 8 mm in particular, knocked out valve guides have a big impact. In case of a knocked out valve guide, the valve head rests eccentrically on one side of the valve seat and is pulled into the seat with the clamp force of the valve spring(s) (Fig. 2). This can cause the valve to break over a longer period of time. Due to the resulting alternating bending stress, the valve breaks at the intersection of the skirt and valve head.
For valves that are operated via rocker arm or finger type rocker, knocked out valve guides result in an increased radial application of force on the valve stem. As a result, the valves break in the groove area for the valve cotter halves.
Installing new valve guides
The valve guides are kept in place in the cylinder head with a press fit. The valve guides supplied by Motorservice are already fully machined on the inside diameter.
Attention:
Due to the press-in procedure, the valve guides might be slightly constricted radially on the inside diameter. The extent of this distortion depends on the ratio between housing bore diameter and outside diameter of the guide. Furthermore, the rigidity of the two components can play a decisive role. If there are strong differences in the rigidity of the housing wall, the radial distortion can differ quite significantly along its length.
Due to the press-in procedure, the valve guides might be slightly constricted radially on the inside diameter. The extent of this distortion depends on the ratio between housing bore diameter and outside diameter of the guide. Furthermore, the rigidity of the two components can play a decisive role. If there are strong differences in the rigidity of the housing wall, the radial distortion can differ quite significantly along its length.
For this reason, once the guides are pressed in and before the valves are installed it must be checked whether the required clearance is present. Distortions on the inside diameter of the valve guide can adversely affect the function of the guide. In order to avoid distortions, the diameter and shape of new guides must be adjusted with a reamer.
Additional information
When installing and removing the valve guides, ensure correct warming up of the cylinder head (specified by engine manufacturer). Use suitable mounting mandrels. The additional cooling off of the valve guides facilitates assembly.
Additional information
When installing and removing the valve guides, ensure correct warming up of the cylinder head (specified by engine manufacturer). Use suitable mounting mandrels. The additional cooling off of the valve guides facilitates assembly.
